The Ultimate Guide to Heavy-Duty Brake Chambers: Selection, Safety, and Maintenance
If you’ve ever been flying down a 6% grade with 80,000 pounds behind you, you know that your life basically boils down to a few thick springs and some rubber diaphragms. We’re talking about brake chambers. They aren't fancy, and they’re usually covered in road salt and grime, but they are the only thing standing between a controlled stop and a runaway truck.
In this guide, we aren't going to fluff it up. We’re going to get into the grit of how these things actually operate, why "long stroke" isn't just a marketing term, and how to spot a chamber that’s about to give up the ghost before it costs you a CSA point or worse.
1. What exactly is a Brake Chamber?

Look at it this way: a brake chamber is just a translator. It takes the air pressure from your tanks and turns it into the brute physical force needed to shove brake shoes against a drum.
On a heavy rig, hydraulic fluid (like in your pickup) just won't cut it—the heat and weight are too much. We use air because it’s reliable, but the chamber is the "muscle" of the whole operation. When you hit that pedal, you’re asking a piece of rubber inside that canister to flex and push a steel rod. If that rubber (the diaphragm) has a pinhole leak or the housing is rusted out, you're losing braking power. It’s that simple.
2. The Two Main Players: Service vs. Spring Chambers
You’ll see two types of "pots" under a truck, and you need to know which is which before you start unbolting things.
Service Brake Chambers (The "Singles")
A service brake chamber has one primary job: apply and release the brakes. At its core, it works similarly to the braking system in a typical passenger car—both systems convert pedal input into force at the wheels. The key difference is the power source: a car uses hydraulic brake fluid, while an air-brake system uses compressed air to generate that braking force.
- Location: Usually on your steer axle.
- Purpose: These are basic. They only work when you’re actually stepping on the brake pedal. No air, no brakes.
- Application: It’s a single pancake-style housing with one diaphragm inside.

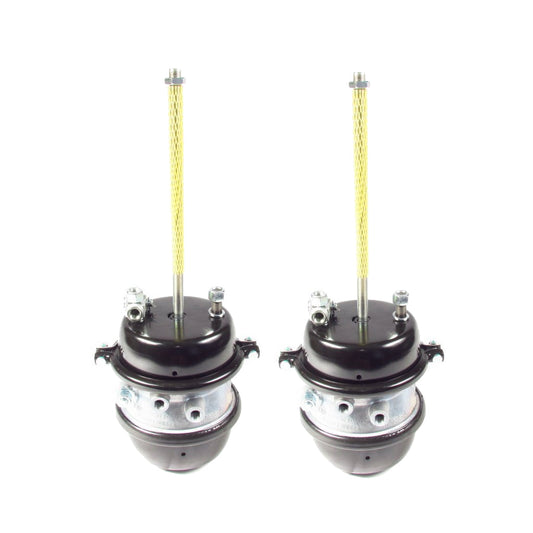
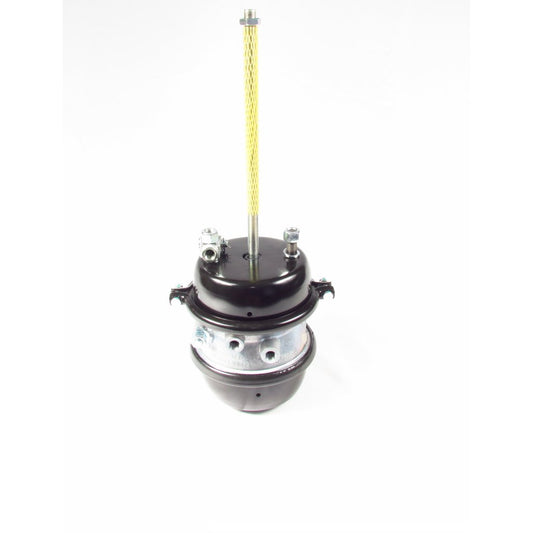
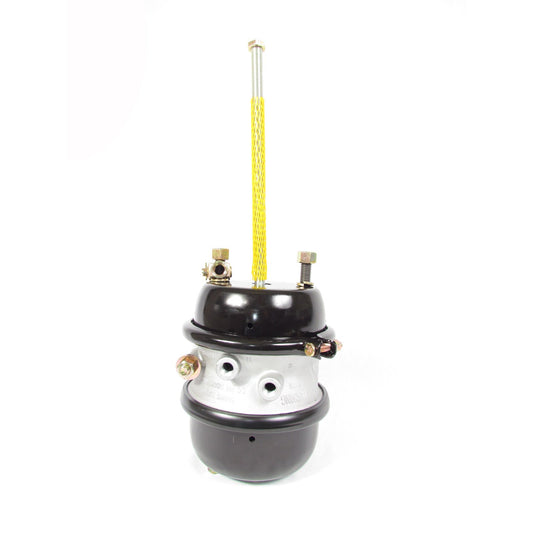
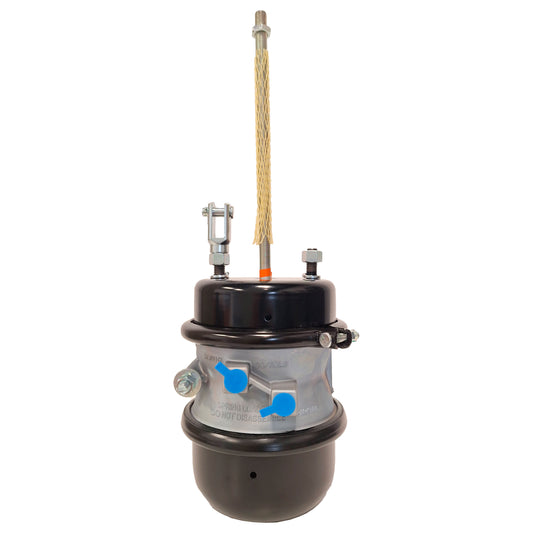
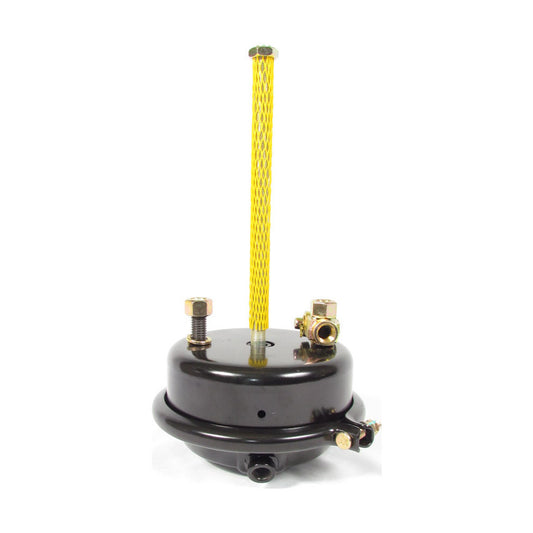
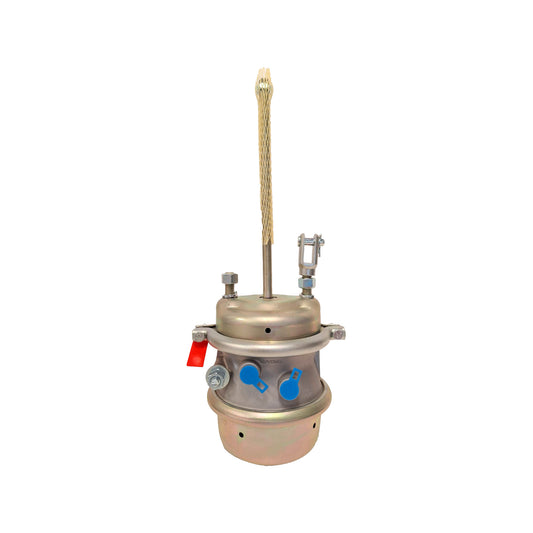
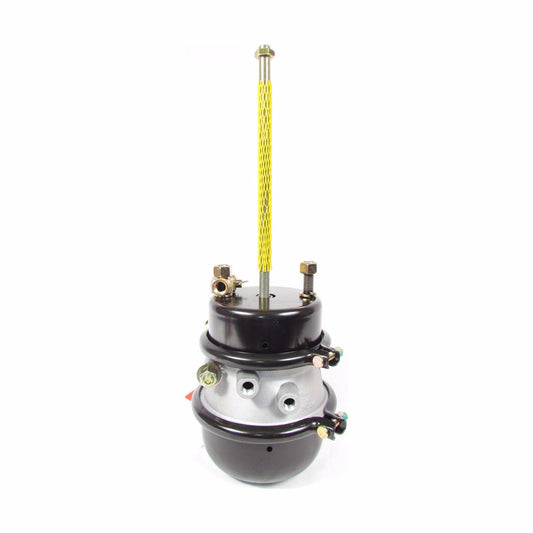
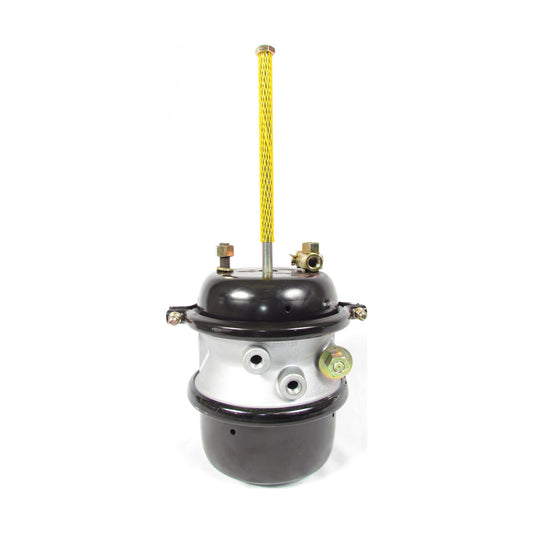
Spring Brake Chambers (The "Piggybacks")
While a service brake chamber performs only one task, a spring brake chamber is built as a two-section assembly, with each section doing a different job. The front section functions as the service chamber and uses the same core components most importantly a rubber diaphragm to apply and release the brakes during normal driving. The rear section contains a powerful spring that provides parking and emergency braking.
In a combination unit, the spring brake section is essentially piggybacked onto the service section, and the two operate like separate chambers within one housing. Unlike service brakes, spring brakes are not applied by adding air pressure. They apply when air pressure is removed or lost, and they release when air pressure is restored. Both sections act through the pushrod, which moves to engage or disengage the brakes.
- Location: Drive axles and trailer axles.
- Purpose: These are the heavy hitters. They’re a two-in-one deal. One side handles your normal braking (Service), while the other side holds a massive, terrifyingly strong coil spring.
- The "Fail-Safe": That Spring is what keeps your truck from rolling away when you park. It’s held back by air pressure. If you lose air, that spring snaps forward and locks the wheels. That’s why we call it a "fail-safe," though "emergency brake" is what most drivers know it as.

3. The Path from Pedal to Pad
When you hit the service brakes, you aren't just pushing a pedal; you’re triggering a chain reaction that has to happen in milliseconds. It’s a dead-simple process, but if one link in this chain is weak, the whole truck is a runaway waiting to happen.
- Air Hits the Port: Compressed air slams into the chamber through the intake.
- The Diaphragm Flexes: That air hits a heavy-duty rubber pancake (the diaphragm). It’s designed to balloon out under pressure.
- The Pushrod Moves: The diaphragm shoves a metal plate, which is hooked to a steel rod (the pushrod).
- The S-Cam Rotates: That rod pushes your slack adjuster. The slack adjuster then twists the S-cam, which acts like a wedge.
- Friction Happens: The S-cam forces your brake shoes out against the drum.
If you’ve got a hole in that diaphragm the size of a needle, you’re losing the "push" needed to make that S-cam rotate. You’ll hear it that distinct hiss long before you feel the brake fade.
Lets take a look to a parcial video that talks specifically about these steps created by @crashforensics in youtube:
4. Long Stroke vs. Short Stroke: The DOT’s Favorite Trap
If there is one thing that’ll get you a "red tag" during a roadside inspection, it’s having the wrong stroke length or being out of adjustment. This isn't just a technicality; it’s about having enough "reach" to actually stop.
Short Stroke (The Old Standard)
These usually have about 2.5 inches of travel on a standard Type 30. The problem? When those drums get hot, they expand. If your brakes are even slightly out of adjustment, a short-stroke pushrod can "bottom out" before the shoes even touch the drum. You’re pushing the pedal to the floor, but nothing is happening at the wheel.
Long Stroke (The Modern "LS")
A Type 30LS gives you roughly 3.0 inches of travel. That extra half-inch is your "safety net." When things get hot and the metal expands, the long-stroke chamber has enough extra reach to find the drum and actually bring you to a halt.
How to Tell the Difference (Without Guessing)
Never assume a chamber is a standard or a long-stroke just by looking at the size of the can. If you mix them on the same axle, the truck will pull hard to one side under heavy braking. Look for these "tells":
- The Shape of the Tag: Look at the ID tag under the clamp bolt. If it’s a trapezoid (triangular), it’s almost always a long-stroke. Standard tags are usually round or rectangular.
- The Air Ports: Take a close look at the "bosses" where the air lines screw in. On many models (like MGM or Bendix), square bosses mean long-stroke, while round bosses mean standard.
- The Markings: Most manufacturers are stamping "LS" right into the housing now. You might also see a notch or a specific color band on the pushrod itself.
5. The Tech Side: Measuring, Caging, and "Clocking"
How to Measure Brake Stroke (The "Applied Stroke" Method)
You can’t just eyeball a brake chamber and say, "Yeah, looks good." You need to know exactly how much that pushrod is moving. This is what the DOT is looking for when they pull you over.
- Mark It: With the brakes released, take a piece of chalk or a paint pen and mark the pushrod right where it exits the chamber.
- Apply Pressure: Have someone in the cab floor the brake pedal (you need at least 90 psi in the tanks for an accurate read).
- The Measurement: Measure the distance from your mark back to the chamber face.
- The "Rule of Thumb": On a standard Type 30 (Short Stroke), if that rod moves more than 2 inches, you’re out of adjustment. For a Type 30LS (Long Stroke), you’ve got a bit more breathing room, but once you hit 2.5 inches, you’re looking at a violation.
Safety First: How to "Cage" the Beast
WARNING: The "power spring" inside a spring brake chamber is under thousands of pounds of pressure. If that housing snaps or you try to pry it open, it will literally explode. We call it the "Kill Spring" for a reason.
If you need to replace a chamber or a slack adjuster, you have to "cage" it (compress that spring manually) so the pushrod retracts.
- Pull the Cap: Pop the dust plug out of the center-back of the chamber.
- The T-Bolt: Grab your caging bolt (usually tucked into a bracket on the side of the chamber). Slide it into the hole and give it a 90-degree turn until it locks into the internal plate.
- Wrench it Down: Use a 3/4" wrench or socket to tighten the nut on that bolt. You’ll feel the tension. Keep going until the pushrod pulls all the way back.
- Pro Tip: Never use an impact wrench to cage a brake. If that bolt threads are stripped or the internal plate is rusted, you want to feel it failing, not have it snap under the power of an air gun.
"Clocking" the Chamber
When you buy a universal replacement chamber, the air ports are rarely pointing the right way. "Clocking" is just the fancy term for rotating the housing so your air lines aren't kinked or rubbing against the frame.
- Loosen the Clamps: You don't need to take the bolts all the way out. Just loosen them enough so the "pancake" housing can spin.
- The Alignment: Rotate it until the ports line up perfectly with your hoses. A kinked hose is a restricted brake—don't "make it work"; make it right.
- Torque it Back: Once it’s lined up, tighten those clamp bolts back down. Most manufacturers want about 25-30 ft-lbs. If you leave them loose, you’ll have a massive air leak the second you hit the pedal.
6. The Buying Guide: Don’t Just "Guess and Press"
When you’re ordering a replacement, don't rely on the "it looks about right" method. Have these four specs written down before you call the parts house:
- The Type Size: (Type 20, 24, 30, 36). This number isn't just a random label—it’s the square inches of the diaphragm. If you put a Type 24 on one side of an axle and a Type 30 on the other, the truck is going to pull like a mule every time you touch the brakes.
- The Stroke: Standard or Long Stroke (LS)? We covered this, but verify it. Check for that trapezoid tag or the square air ports.
- Clevis Style: Do you need a threaded pushrod (where you screw the clevis on yourself) or a welded clevis (pre-set at the factory)?
- Pushrod Length: Most new chambers come with a long, "universal" pushrod. You’ll likely have to hit it with a sawzall or a cutoff wheel to match the length of the old one. Measure three times, cut once. If you cut it too short, you just bought a very heavy paperweight.